
- ﹒
- ﹒
- ﹒
- ﹒
- |
- |
-
Search
Find Service Locations
Encrypted connection setup guide for "WiFi GO" ─ Windows 11
1. Click the network icon  in the notification area at the bottom right of the window to open the function window.
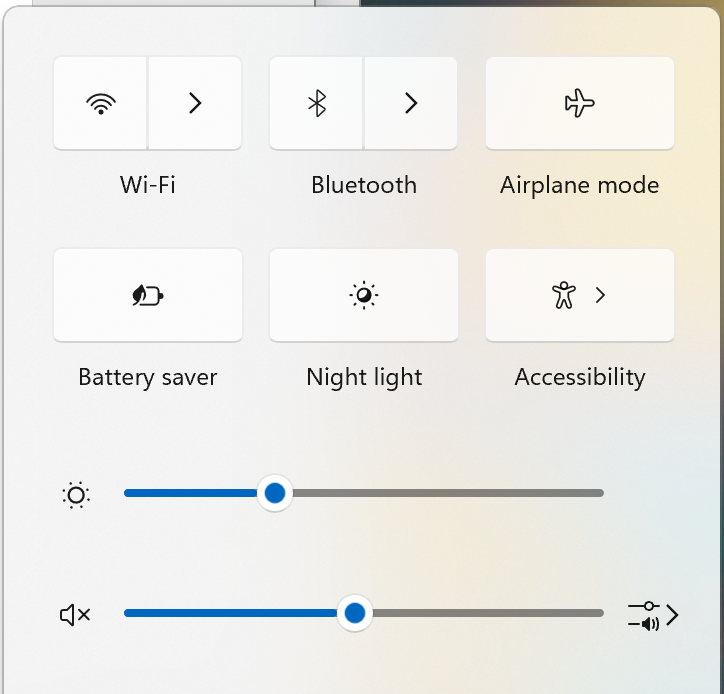
2. In the function window, first click icon 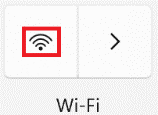 to turn on Wi-Fi, then click icon
  to view a list of available Wi-Fi.

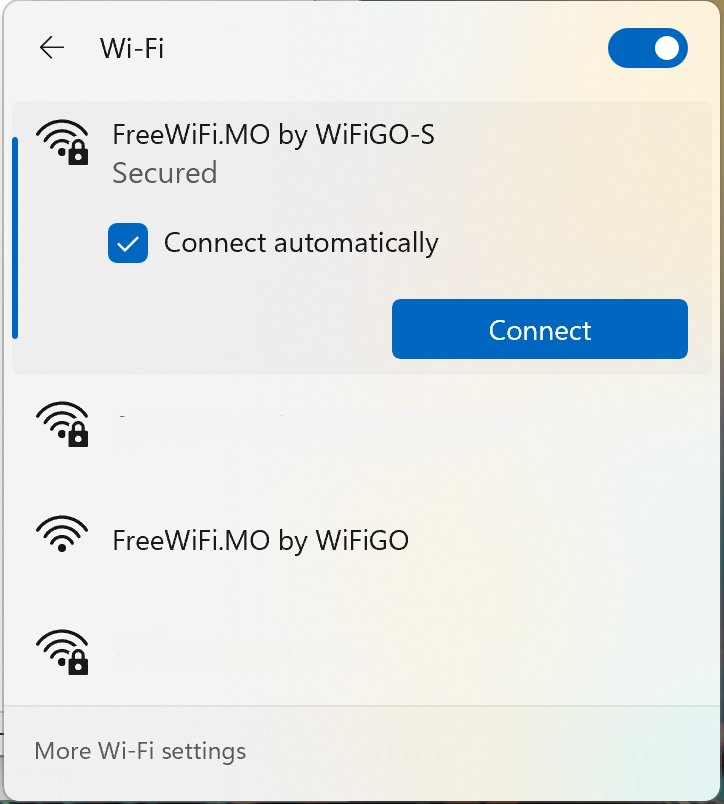
3. In the list, click "FreeWiFi.MO by WiFiGO-S", and press "Connect".
If you click "connect automatically", and next time your system will be automatically connected the FreeWiFi.MO by WiFiGO-S network.
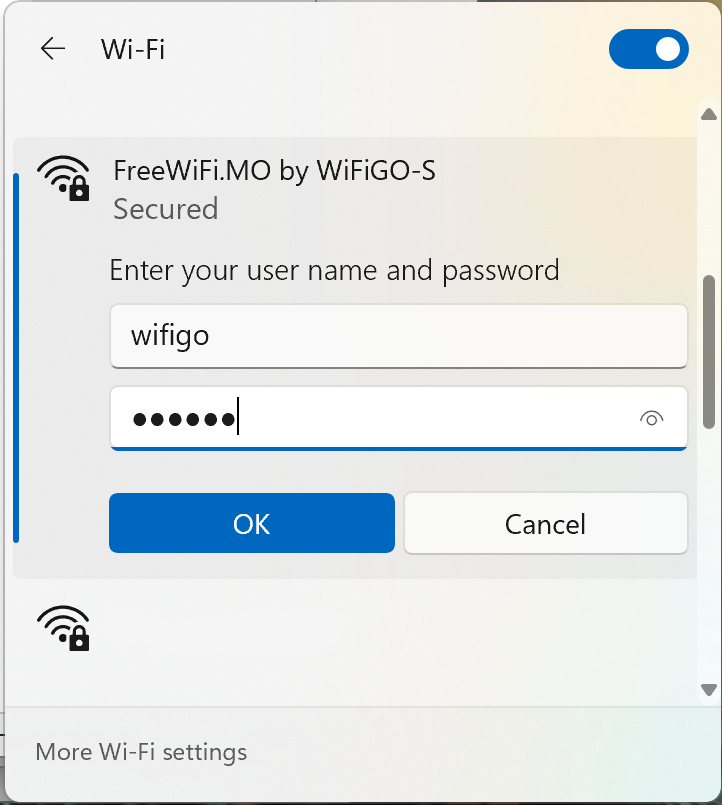
4. Enter the "WiFi GO" 's user name and password, then press "OK".
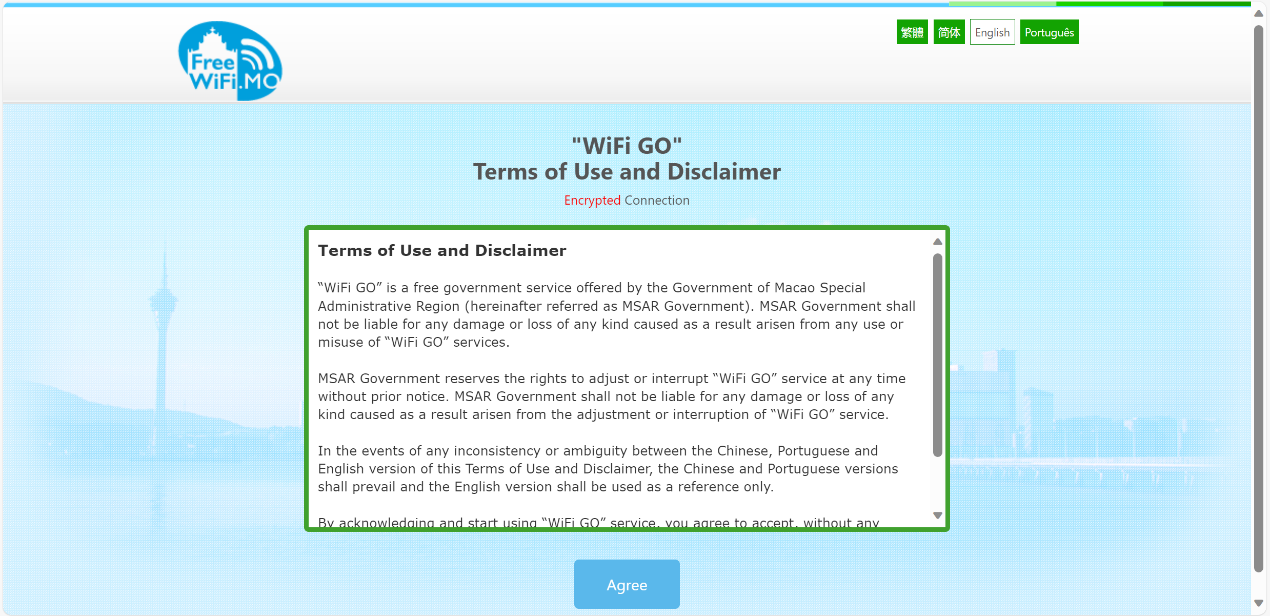
5. Activate the browser and accept the "Terms of Use and Disclaimer" of "WiFi GO", press "Agree".
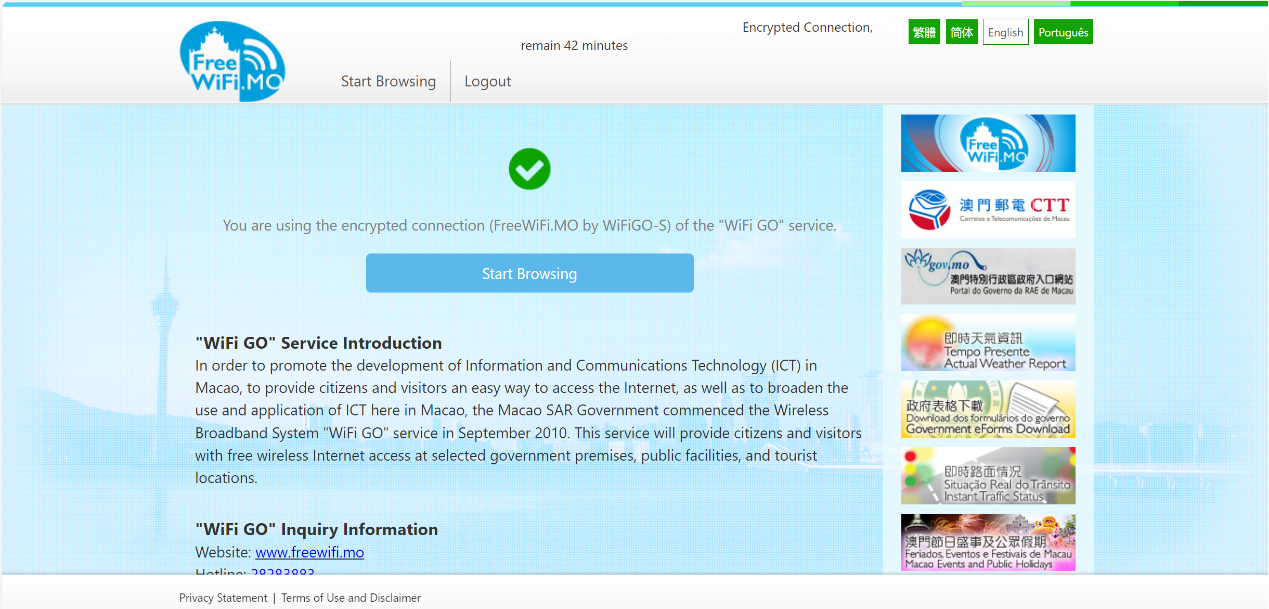
6. Commence browsing the Internet.
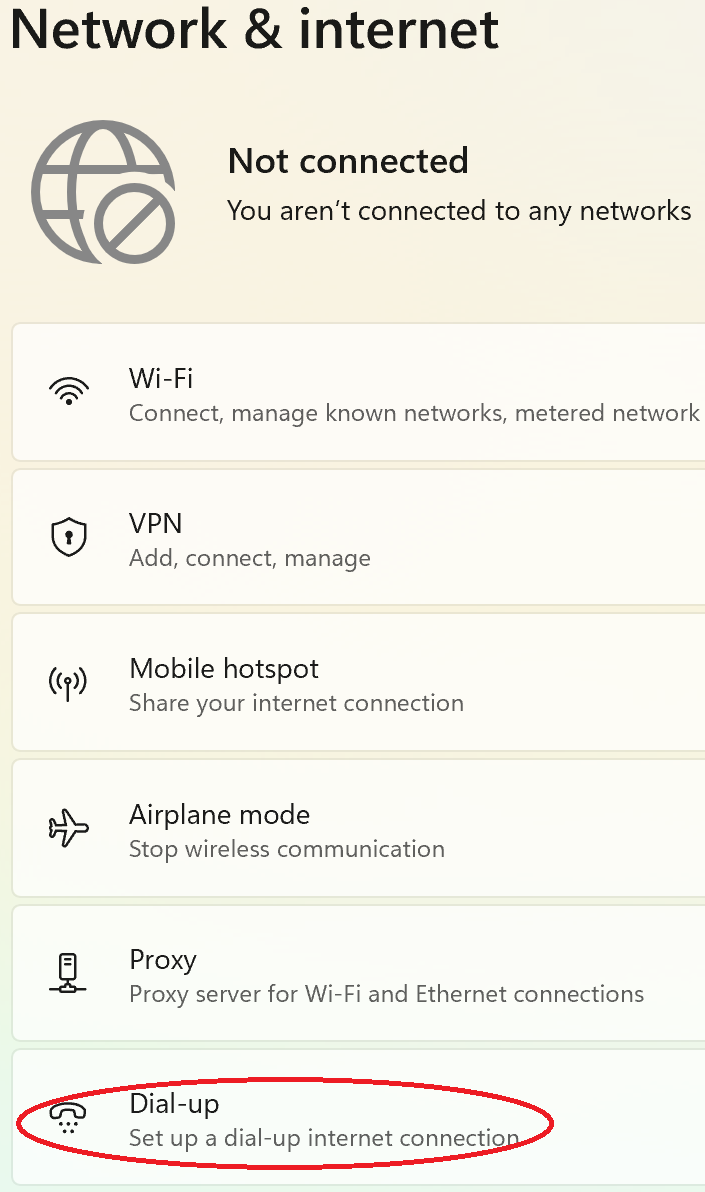
1. Right-click the "Start" icon  > "Network Connections" > "Dial-up".
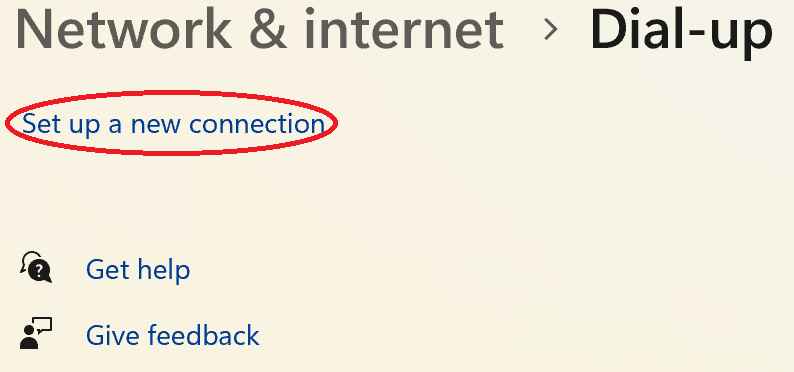
2. Press "Set up a new connection ".
3. Select "Manually connect to a wireless network".

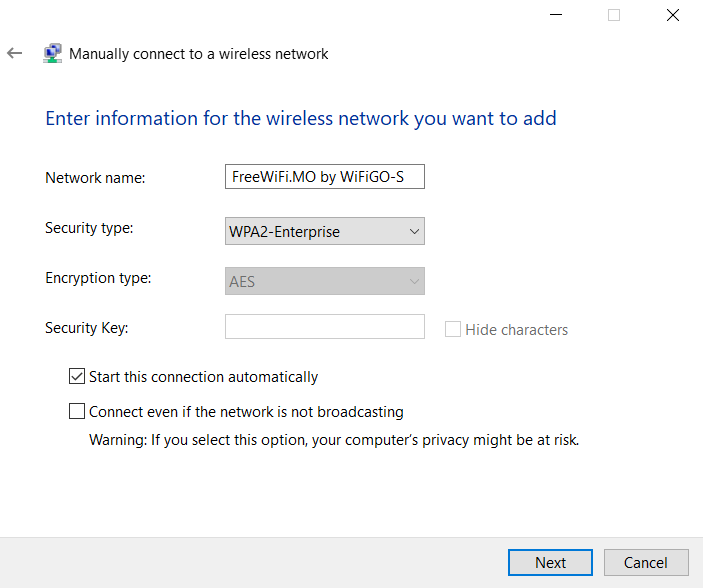
4. Type and select the following information, and then press "Next".
If you click "Start this connection automativally", and next time your system will be automatically connected the FreeWiFi.MO by WiFiGO-S network.
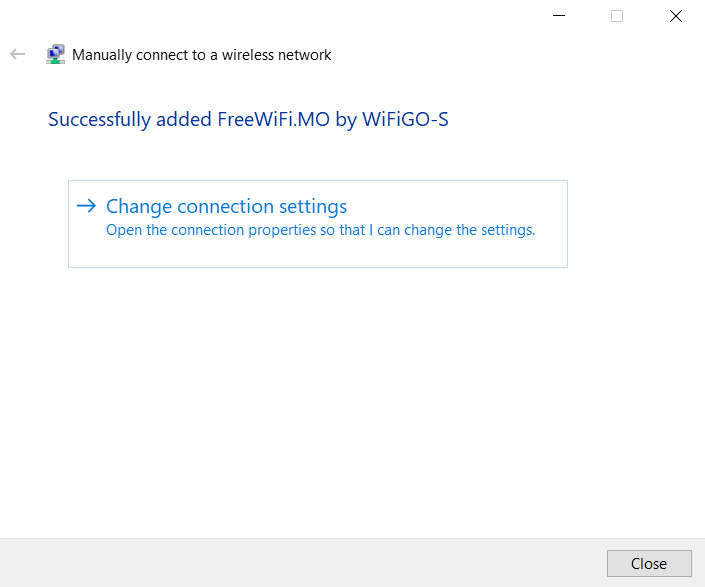
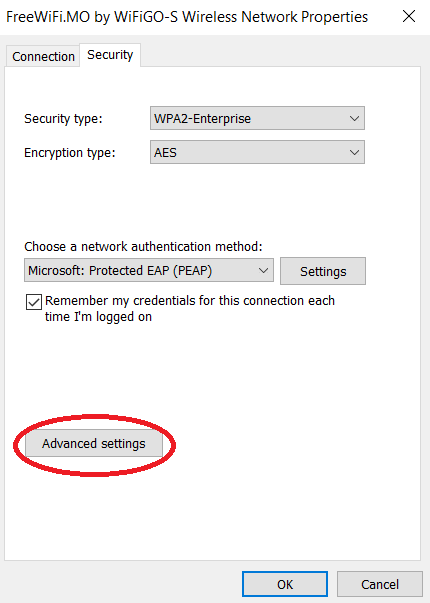
5. Click "Change connection settings".
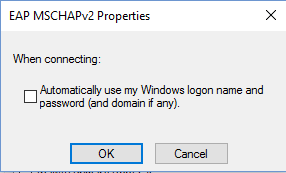
6. Select "Security".
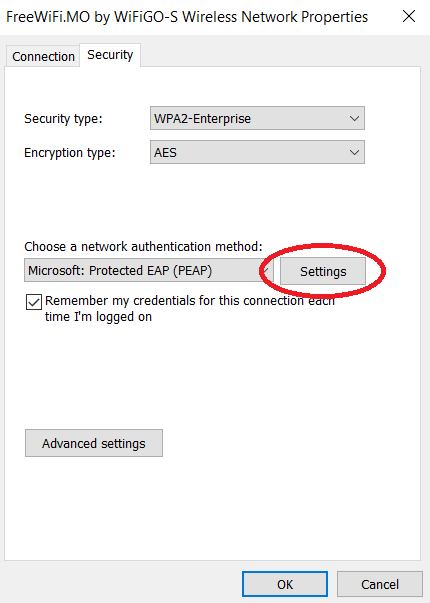
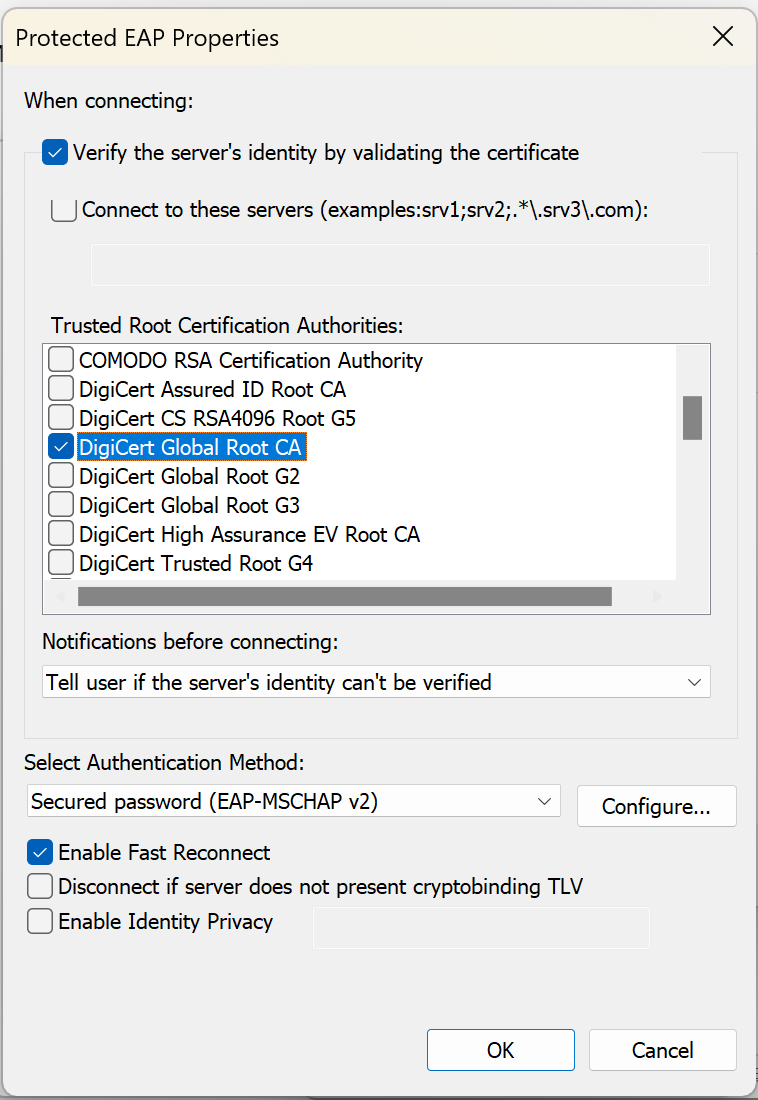
7. Un-tick "Automatically use my Windows logon name and password (and domain if any)", press "OK", and press "OK" on previously open window.
8. Select "Security", Press "Advanced Settings".
9. Select "802.11X setting",
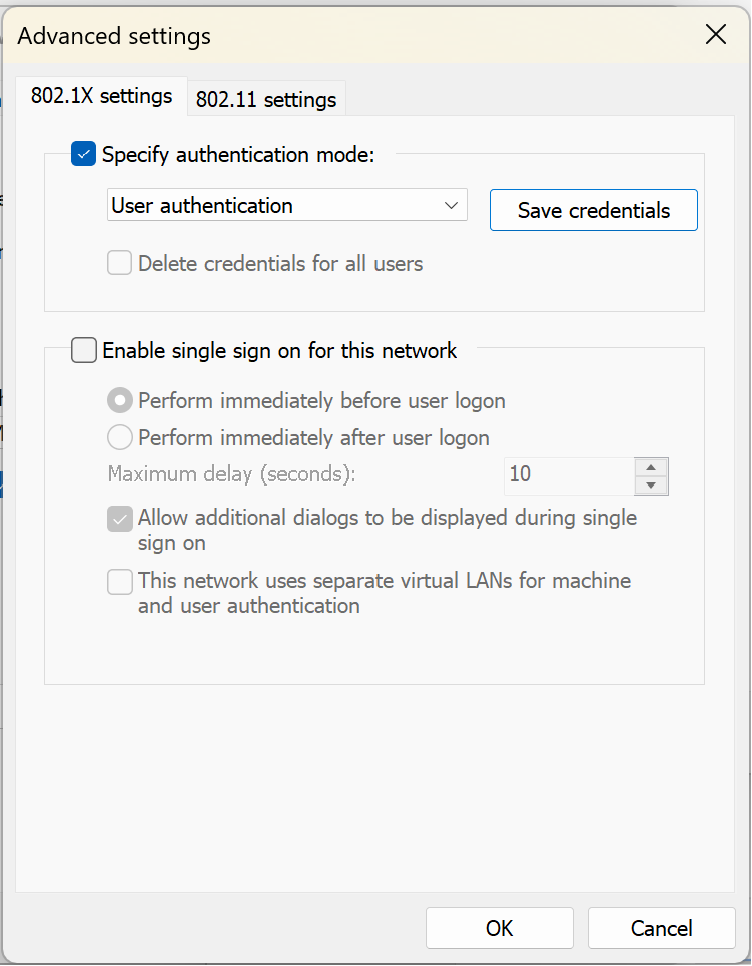
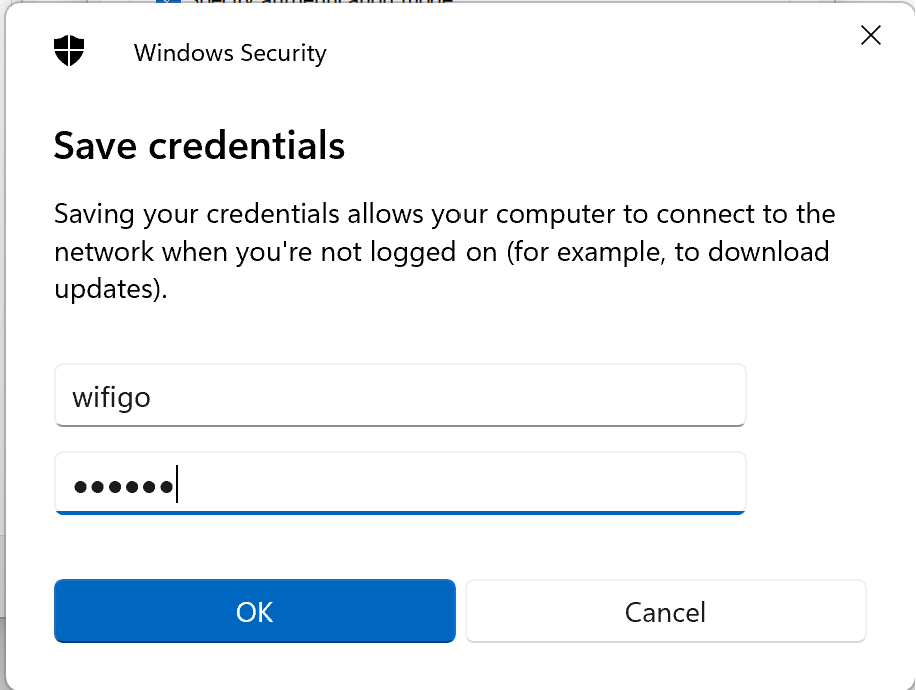
10. In the "Save Credentials" window, enter User name and Password of "WiFi GO", then press "OK", and back to the previously window and press "OK".
11. Activate the browser and accept the "Terms of Use and Disclaimer" of "WiFi GO", press "Agree".
12. Commence browsing the Internet.
UnEncrypted connection setup guide for "WiFi GO" ─ Windows 11
1. Click the network icon  in the notification area at the bottom right of the window to open the function window.

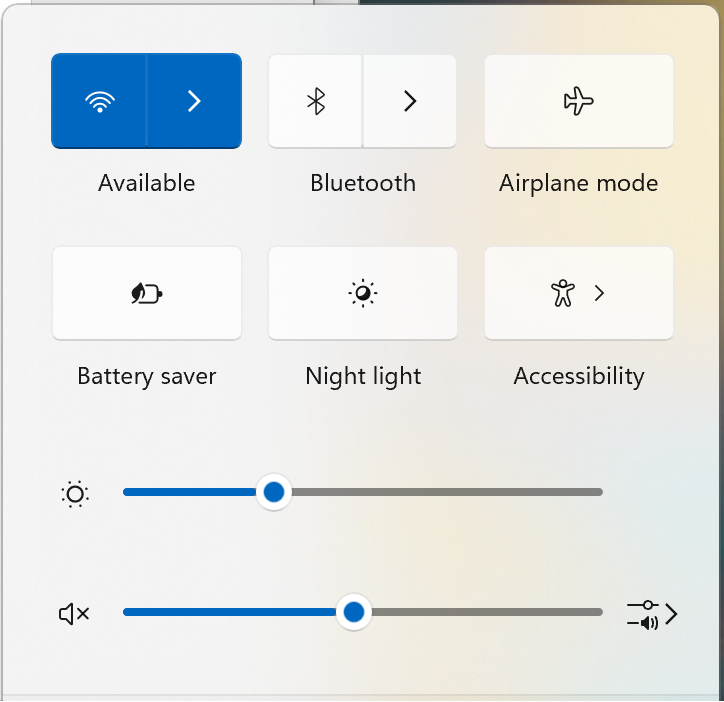
2. In the function window, first click icon  to turn on Wi-Fi, then click icon
 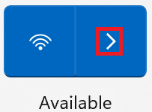 to view a list of available Wi-Fi.
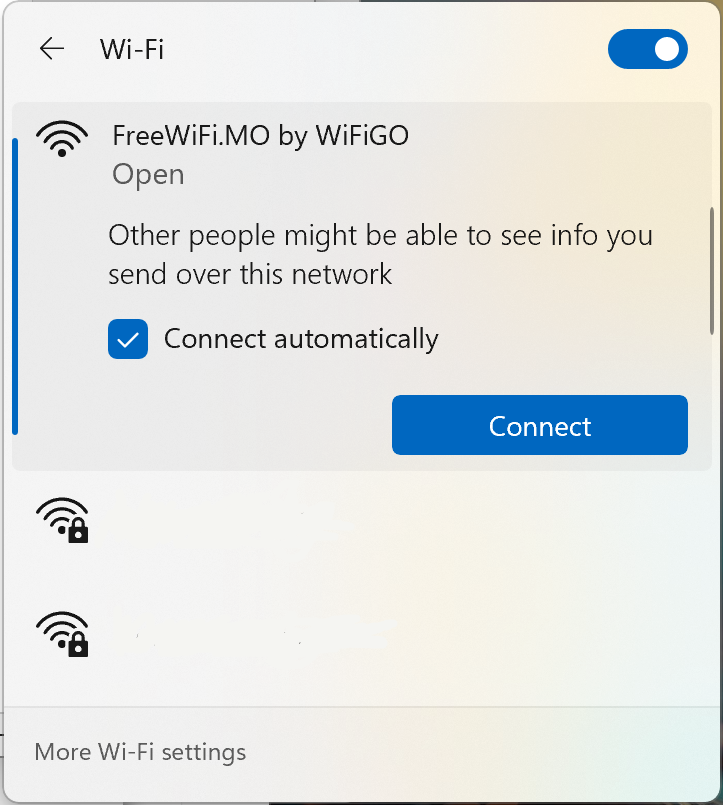
3. In the list, click "FreeWiFi.MO by WiFiGO", and press "Connect".
If you click "connect automatically", and next time your system will be automatically connected the FreeWiFi.MO by WiFiGO network.
4. Activate the browser and accept the "Terms of Use and Disclaimer" of "WiFi GO", press "Agree".
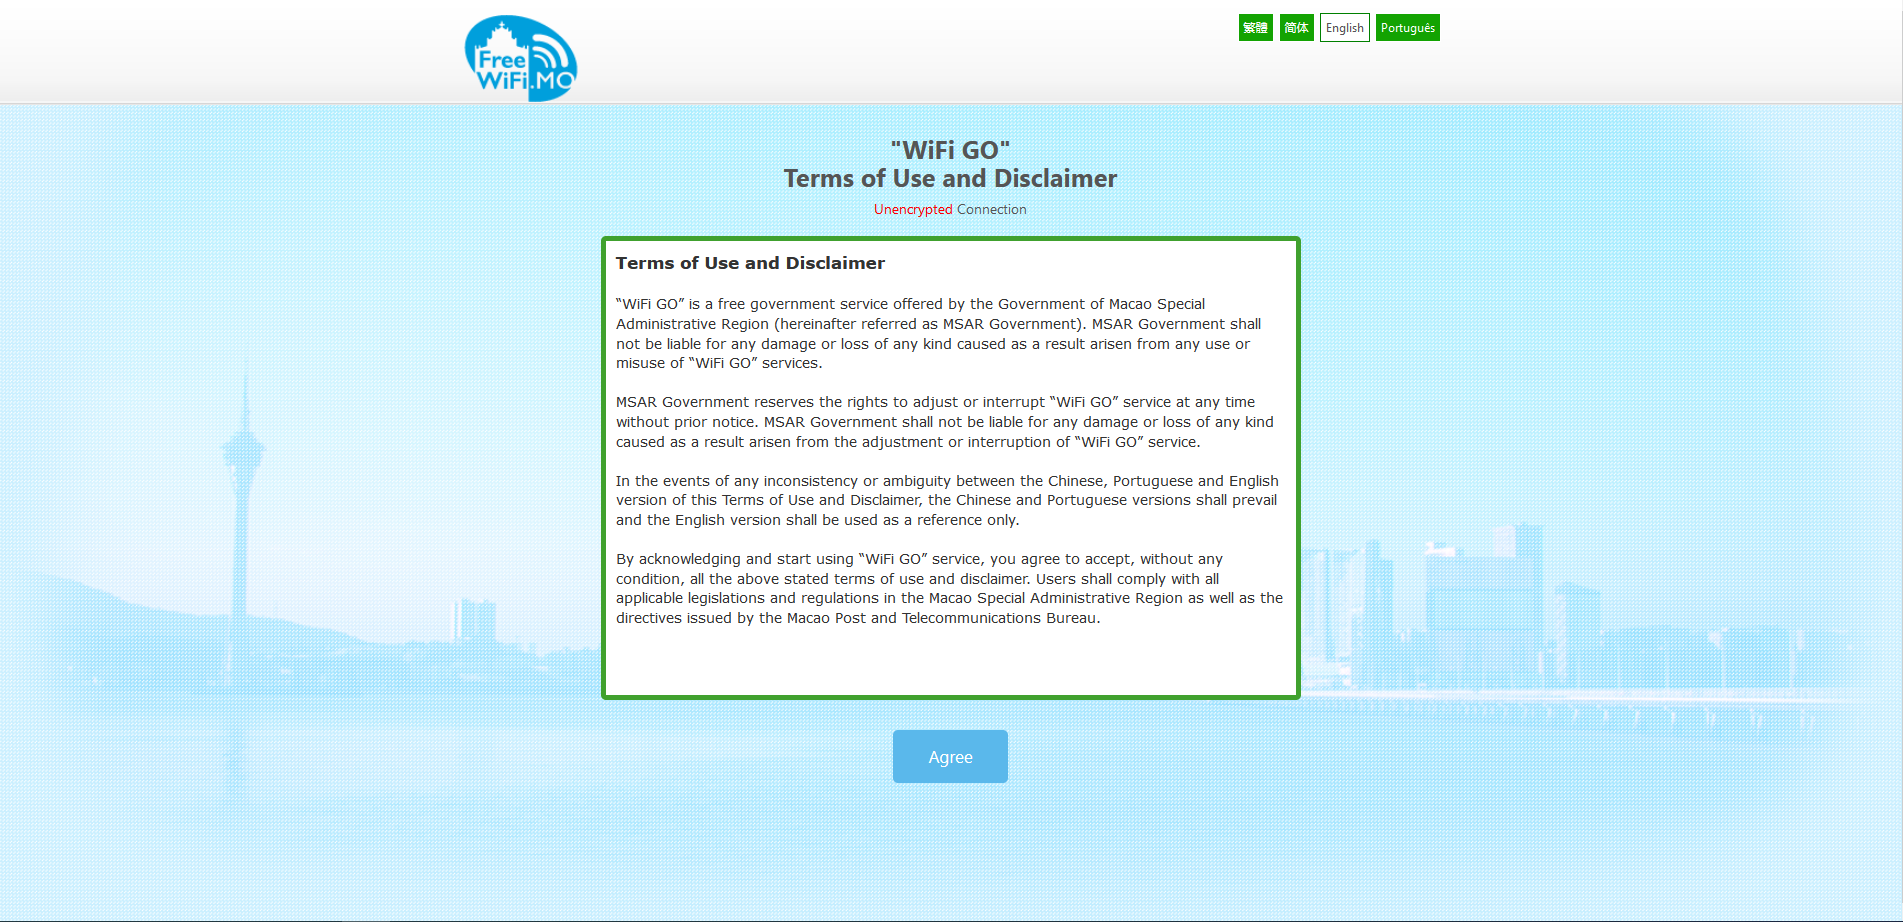
5. Commence browsing the Internet.

1. Right-click the "Start" icon  > "Network Connections" > "Dial-up".

2. Press "Set up a new connection ".

3. Select "Manually connect to a wireless network".

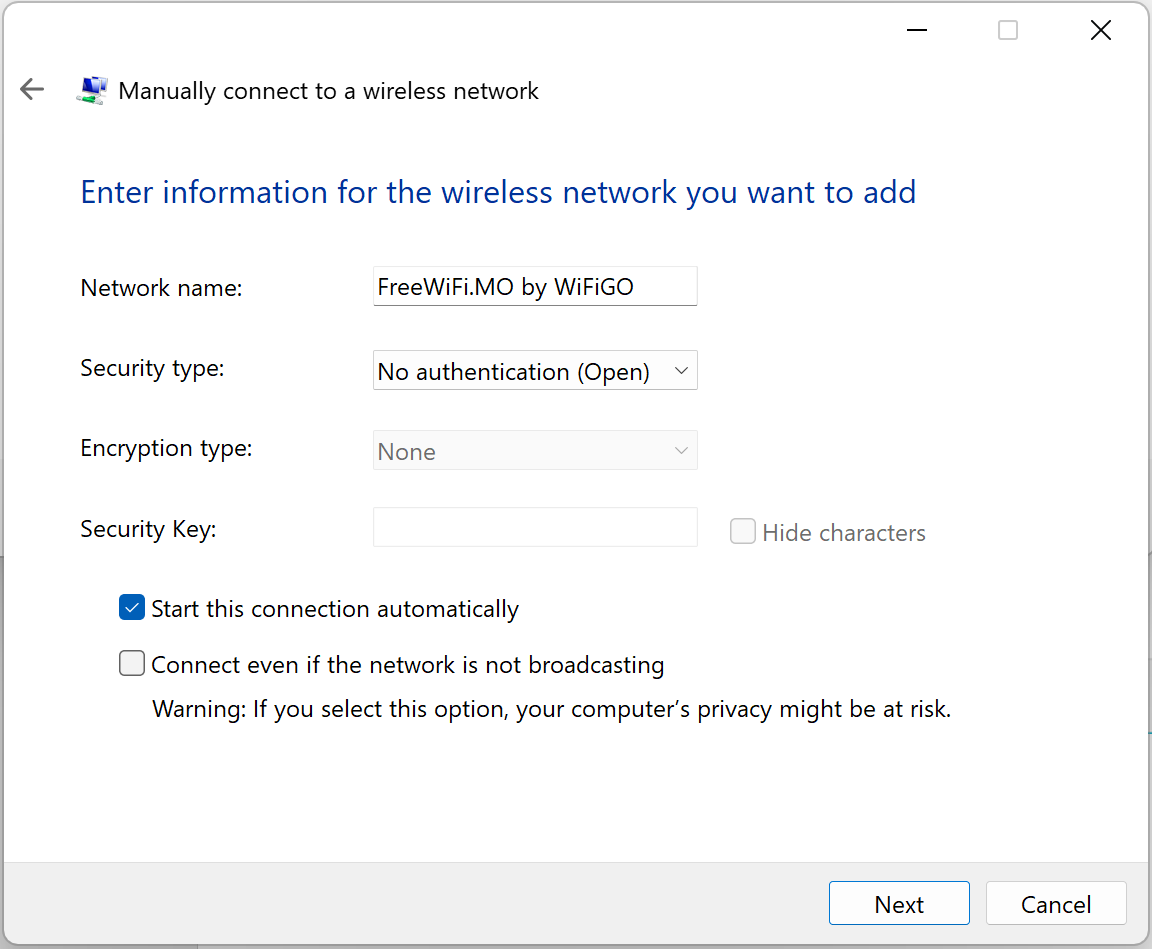
4. Type and select the following information, and then press "Next".
If you click "Start this connection automativally", and next time your system will be automatically connected the FreeWiFi.MO by WiFiGO network.
5. Activate the browser and accept the "Terms of Use and Disclaimer" of "WiFi GO", press "Agree".

6. Commence browsing the Internet.
Encrypted connection setup guide for "WiFi GO" ─ Windows 11
1. Click the network icon in the notification area at the bottom right of the window to open the function window.
2. In the function window, first click icon to turn on Wi-Fi, then click icon to view a list of available Wi-Fi.
3. In the list, click "FreeWiFi.MO by WiFiGO-S", and press "Connect".
If you click "connect automatically", and next time your system will be automatically connected the FreeWiFi.MO by WiFiGO-S network.
4. Enter the "WiFi GO" 's user name and password, then press "OK".
5. Activate the browser and accept the "Terms of Use and Disclaimer" of "WiFi GO", press "Agree".
6. Commence browsing the Internet.
1. Right-click the "Start" icon > "Network Connections" > "Dial-up".
2. Press "Set up a new connection ".
3. Select "Manually connect to a wireless network".
4. Type and select the following information, and then press "Next".
If you click "Start this connection automativally", and next time your system will be automatically connected the FreeWiFi.MO by WiFiGO-S network.
5. Click "Change connection settings".
6. Select "Security".
7. Un-tick "Automatically use my Windows logon name and password (and domain if any)", press "OK", and press "OK" on previously open window.
8. Select "Security", Press "Advanced Settings".
9. Select "802.11X setting",
10. In the "Save Credentials" window, enter User name and Password of "WiFi GO", then press "OK", and back to the previously window and press "OK".
11. Activate the browser and accept the "Terms of Use and Disclaimer" of "WiFi GO", press "Agree".
12. Commence browsing the Internet.
UnEncrypted connection setup guide for "WiFi GO" ─ Windows 11
1. Click the network icon in the notification area at the bottom right of the window to open the function window.
2. In the function window, first click icon to turn on Wi-Fi, then click icon to view a list of available Wi-Fi.
3. In the list, click "FreeWiFi.MO by WiFiGO", and press "Connect".
If you click "connect automatically", and next time your system will be automatically connected the FreeWiFi.MO by WiFiGO network.
4. Activate the browser and accept the "Terms of Use and Disclaimer" of "WiFi GO", press "Agree".
5. Commence browsing the Internet.
1. Right-click the "Start" icon > "Network Connections" > "Dial-up".
2. Press "Set up a new connection ".
3. Select "Manually connect to a wireless network".
4. Type and select the following information, and then press "Next".
If you click "Start this connection automativally", and next time your system will be automatically connected the FreeWiFi.MO by WiFiGO network.
5. Activate the browser and accept the "Terms of Use and Disclaimer" of "WiFi GO", press "Agree".
6. Commence browsing the Internet.

FreeWiFi.MO mobile app download


© 2024 CTT. All Rights Reserved.
FreeWiFi.MO mobile app download
© 2024 CTT. All Rights Reserved.
 Language


